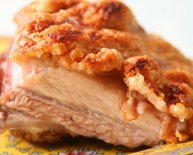
Chinese flaky egg tarts recipe
 Prior to baking, I did a lot of research on various ingredients, methods and techniques, by reading different recipes posted by bloggers and watching several youtube videos to familiarize with folding techniques of the dough. Technique is pretty much similar, adopting 3x3x4 (i.e. roll dough flat, fold into 3 folds, roll dough flat, fold into 3 folds again and finally roll dough flat, fold into 4 folds).
However, in terms of ingredients, different proportions, types and even the temperature of baking. So in the end, I decided to adapt the one from the workshop because I remember it was very good, but I did some changes along the way as well.
And so like I mentioned, there are 2 doughs used, the oil dough and water dough. Water dough is pretty straightforward, just combine all the ingredients to form a dough. As for the oil dough, some recipes use flour + butter, some use butter only, some use flour + shortening + butter, some use lard. I've come across one recipe that uses flour + butter + vegetable oil (featured in magazine without any reference), not sure if it's really doable.
The recipe I learned from the workshop uses flour + shortening + butter. The advantage of using shortening is it's more stable than butter (melts more slowly). So when you are rolling and folding the layers, the dough doesn't melt/break/fall apart that easily and you can achieve the 3x3x4 folding at one go. Whereas, if you use flour + butter, in between the folds, you have to chill the dough (15-20 mins), else the skin of the dough breaks easily.
This was my very first attempt. I decided to use flour + butter for my oil dough. coz I was reluctant to use shortening. Being inexperienced and the hot and humid weather didn't help, the skin of my oil dough broke during the first fold and it became very messy as butter leaked everywhere (top, bottom, sides). Other problems like the cookie cutter I used to cut each piece of tart dough was too small, I filled too much egg filling etc. So it looked quite ugly and didn't taste crispy (a bit hard).
For my second attempt, I made half recipe using flour + shortening + butter for the oil dough, and another half recipe using flour + butter.
I wanted the flaky layers to look more visible (round cutter cannot achieve that) so I went to buy a set of fluted cookie cutters.
Egg tart looked slightly better, but still filled too much egg custard filling; cookie cutter used still too short (I want to create more height in order to make the layers more visible) and temperature of baking too high.
In terms of taste, the one that used butter won hands-down. It was buttery and very fragrant, whereas the one that added shortening tasted quite flat.
And so, my third attempt, I decided to give the flour + butter dough another chance (skip shortening altogether). I made sure I chilled the oil dough sufficiently in between, dust the work surface properly with each fold, used a larger cutter to stamp each tart, filled the egg filling to about 70-75%, baked at lower temperature (staggered temperature control). All in all, the key ingredient was patience (because our weather is very humid and butter melts very easily). It was a long drawn process indeed.
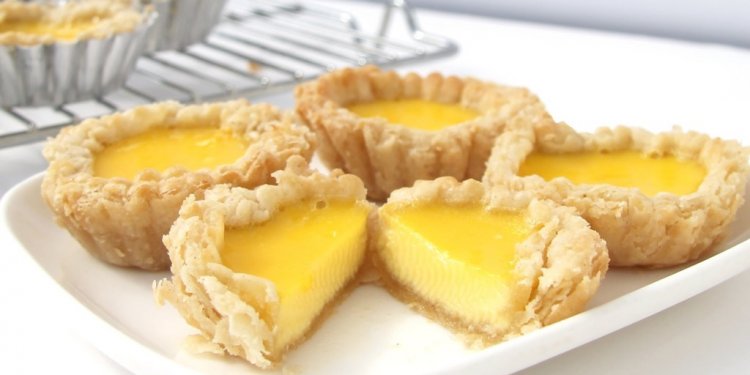
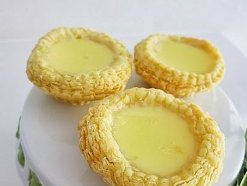
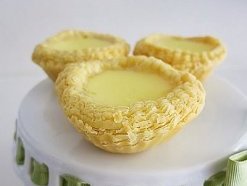
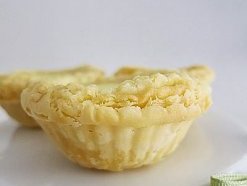
I guess my patience got rewarded and the egg tart turned out so much better looking! It was so flaky that pieces of tart fell all over the place as I was biting into the tart
 I also tested the egg custard filling with 2 different recipes, 1 using evaporated milk and another using fresh milk. In the end, the one using fresh milk turned out slightly better, more creamy and smooth.
Hong Kong Flaky Egg Tart
- Recipe yields 8 tarts
- 4cm base tart casing (measures 6cm from the top)
- 9cm fluted cookie cutter
Oil Dough
- 100g Plain Flour, sifted
- 160g Unsalted Butter, cubed and keep in chiller until use
Water Dough
- 20g Bread Flour, sifted
- 60g Plain Flour, sifted
- 5g Custard Powder, sifted
- 10g Egg
- 40g Iced Water
Filling (Option 1 - Fresh Milk)
- 100g Fresh Milk
- 50g Caster Sugar
- 2 Eggs
- 1 drop Vanilla Extract
Filling (Option 2 - Evaporated Milk)
- 40g Evaporate Milk
- 100g Sugar Syrup (made using 100g water + 50g sugar)
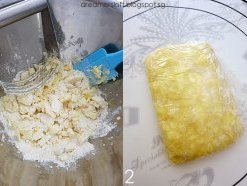
1. Make the oil dough. Combine the flour and cold cubed butter in a large bowl. Use pastry cutter to press the butter into the flour until it forms a rough dough. Alternatively, use electric blender and pulse the mixture until rough dough forms. Work quickly so that butter do not melt.
2. Place the dough on a piece of clingwrap and wrap it up into a small rectangle parcel (about 10cm x 15cm). Chill in fridge for 30 mins.
3. Make water dough. Combine all the ingredients into an electric mixer, and blend until a dough forms. Knead for 5 mins until dough is smooth (texture feels like ear-lobe). Mold into a rough oval shape, wrap in clingwrap and chill for 20 mins.
 4. Take both water dough and oil dough out from the fridge. Dust the work surface with flour so that the dough will not stick to the work surface. Remove clingwrap (keep it aside). Roll the water dough into a large oval, make sure it has sufficient space allowance for the oil dough to be enclosed within. Place the oil dough in the middle of the water dough.
5. Wrap the water dough like a parcel, encasing the oil dough, make sure no oil dough is exposed at the seams.
6. Slightly flatten/roll the combined dough, dust with some flour top and below and wrap the dough in clingwrap. Chill in the fridge for 20 mins.
7. Retrieve the dough from the fridge. Dust the work surface and rolling pin with flour. Remove clingwrap (set aside), dust top and bottom of dough with flour. Roll the dough into half inch thickness in rectangle shape. Fold one side towards the centre (as shown).
8. Fold the other side towards centre. You will have 3 layers. Dust with flour all around. Wrap in clingwrap and chill in fridge for 20 mins. This is round 1 of folding. (We will do 3x3x4)
9. Repeat step 7.
10. Repeat step 8. This is round 2 of folding.
11. Retrieve the dough from the fridge. Dust the work surface and rolling pin with flour. Make sure to dust a larger surface area. Remove clingwrap (set aside), dust top and bottom of dough with flour. Roll the dough into half inch thickness in rectangle shape. Fold left and right sides towards the centre (as shown).
12. Fold one side of dough towards centre again. You will see 4 layers now. This is round 3 and final round of folding. Dust with flour, clingwrap and chill in fridge for 20 mins.
13. Retrieve dough from fridge. Dust work surface and rolling pin with flour. Place dough on work surface, dust with flour. Roll the dough flat into 0.5cm thickness. Use cookie cutter to stamp the dough into individual tart shells.
14. Wrap tart base using clingwrap (separate each layer) and chill in fridge for 15 mins. *At this point you could freeze the tart base for subsequent use.
15. Retrieve tart base from the fridge. Mold each piece into the tart casing, pressing down the dough towards the sides and bottom of the casing. Avoid touching the top part (perforated) else pattern will not be visible after baking. As you can see, I'm using a larger cookie cutter because I want to create height for the egg tart without having to "push" the base upwards (like some recipes do). Poke some holes in the tart base using a fork gently (not too hard else egg filling will leak). Chill tart base in fridge for 15 mins. Preheat oven at 220 degree celsius.
16. Prepare egg filling. Combine all ingredients of egg filling, make sure sugar is fully dissolved. Sieve the egg filling 2 times. Once tart base is ready, pour the egg filling into each tart to about 70-75%.
17. Place tray of egg tarts at the bottom most rack. Bake at 200 degree celsius for 15 mins. After 15 mins, bake at 180 degree celsius for 10 mins. After 10 mins, slightly open the oven door, slip a cloth or oven mitt by the door and let egg tart bake in residual heat for another 10 mins.
18. After 10 mins, remove the tray from the oven and let egg tarts cool slightly before removing the tarts from the casing.
The ones on the left were filled with evaporated milk egg filling and the ones on the right were filled with fresh milk egg filling. Our family preferred the fresh milk egg filling.
The egg tarts are best served warm. They remain crispy for a couple of hours in the open. If not consumed immediately it's best to keep them covered in the fridge. To re-heat, I just pop them into air-fryer or oven for a few mins and they will become crispy again!
Share this article
Related Posts


Latest Posts


